Query Studio
Overview
Query Studio is the core module for creating and managing topology queries in the Huayang CMDB system. Through a visual graphical interface, you can easily create complex topology queries, define relationships between CIs, and precisely control query results.
What this module can do for you:
- Create reusable query definitions supporting complex topology queries
- Manage query groups for organizing and sharing queries
- Export and import query definitions for cross-environment migration
- Preview and count query results to quickly validate query logic
Main Features
- Visual Query Editor: Build CI topology queries via drag and drop
- Flexible Query Conditions: Supports attribute filtering, link conditions, return attributes, and type filtering
- Query Group Management: Organize queries by business scenario for easy management and use
- Import/Export: Supports batch import and export of query definitions
- Query Preview and Statistics: Preview query results before saving to quickly validate query logic
Interface Layout
The Query Studio main page uses a list + detail organization. The query list supports search, filtering, and batch operations. Clicking a query displays its detailed information.
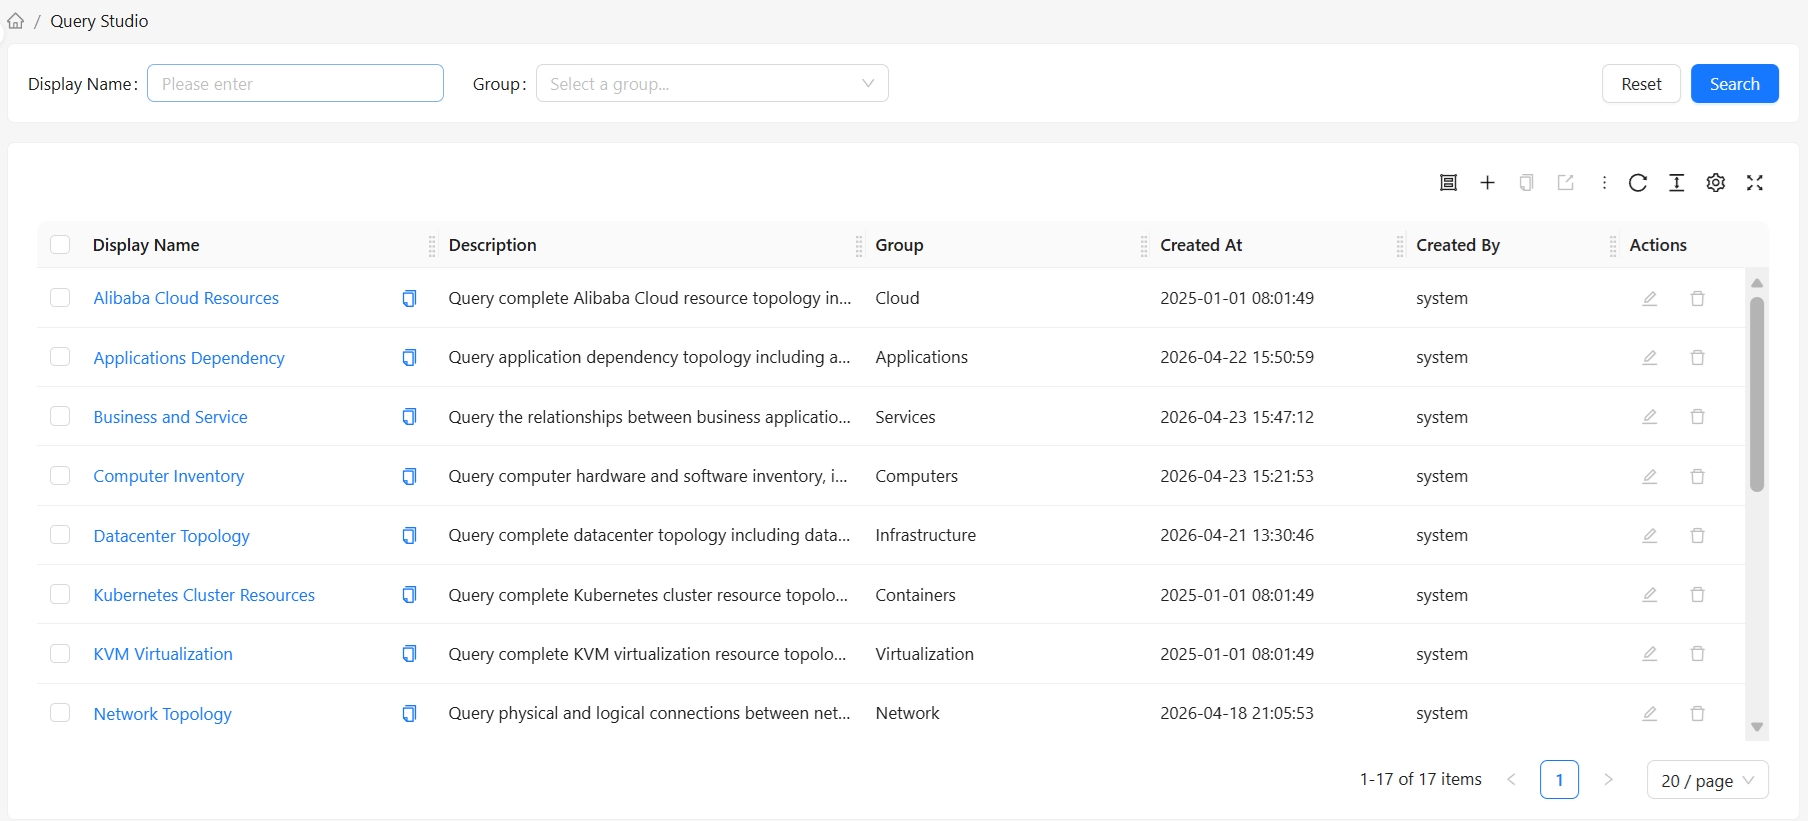
Query List Area
Location: Right main area of the page
Displays a list of all query definitions containing the following information:
- Display Name: Query display name
- Description: Query function description
- Group: Group the query belongs to
- Created At: Query creation time
- Created By: User who created the query
Toolbar
Location: Above the query list
Provides operations on query definitions:
- Manage Query Groups: Opens query group management dialog
- Create Query: Create a new query definition
- Clone Query: Copy the selected query (single selection only)
- Export: Export selected query definitions (JSON format)
- Import: Import query definitions from a JSON file
- Refresh: Refresh the query list
Action Column
Location: Rightmost column of the query list
Operations available for each query row:
- Edit: Modify query definition (system built-in queries cannot be edited)
- Delete: Delete query definition (system built-in queries cannot be deleted)
How to Use
View Query List
- Navigate to the Query Studio page
- All query definitions are displayed
- Use the Search Box to search queries by display name
- Use the Group Filter to filter by query group
View Query Details
- Click a query name in the query list
- Enter the query detail page containing:
- Query Topology Graph: Visual display of query nodes and their connections
- Configuration Panel Tabs: Including CI Types, Attribute Filter, Link Conditions, Return Attributes, Type Filter tabs
Search and Filter
| Filter | Description | Example |
|---|---|---|
| Display Name | Search by query display name | Enter "server" to find related queries |
| Group | Filter by query group | Select a specific group to view all queries in that group |
Toolbar Actions
| Button | Function | Use Case |
|---|---|---|
| Manage Query Groups | Opens query group management dialog to create, edit, or delete query groups | When you need to organize queries by business scenario |
| Create Query | Opens create query dialog to create a new query definition | When you need to define new query logic |
| Clone Query | Copy the selected query to generate a new query | When you need to create a similar query based on an existing one |
| Export | Export selected query definitions as JSON files | When you need to backup queries or migrate to other environments |
| Import | Import query definitions from a JSON file | When you need to restore queries or import from other environments |
| Refresh | Reload the query list | When data has been updated and you need to see the latest state |
Query Group Management
What are Query Groups
Query groups are a way to organize query definitions, similar to a folder concept. You can put related queries in the same group for easy management and retrieval.
Managing Query Groups
- Click the Manage Query Groups button
- In the query group management dialog:
- Create Query Group: Click the "Create Query Group" button, enter group name and display name
- Edit Query Group: Select a group and click the "Edit" button
- Delete Query Group: Select a group and click the "Delete" button (system built-in groups cannot be deleted)
- Export Query Groups: Select one or more groups and click the "Export Selected" button
- Import Query Groups: Click the "Import" button and select a JSON file containing query group definitions
System Groups vs User Groups
- System Groups: System preset query groups; editable but cannot be deleted
- User Groups: User-created custom query groups; freely manageable
Creating a Query
Basic Steps
- Click the Create Query button
- Fill in query basic information:
- Query Name: Unique identifier, can only contain letters, numbers, hyphens, and underscores
- Display Name: Display name for the query
- Description: Query function description
- Query Group: Select the group the query belongs to
- Click OK to create the query
After Creation
After creating a query, you need to enter the query detail page for further configuration. For detailed steps, see Query Details.
Editing a Query
Edit Basic Information
- Find the query to edit in the query list
- Click the Edit button in the action column
- Modify the query's display name or description in the popup dialog
- Click OK to save changes
Edit Query Definition
- Click a query name in the query list to enter the detail page
- Modify the query in the detail page
- Click the Save button to save query modifications
Clone Query
- Select the query to clone in the query list (only one can be selected)
- Click the Clone Query button
- Enter the new query's name and display name in the popup dialog
- Click OK to complete cloning
Cloning creates a complete copy of the query definition, including all CI types, attribute conditions, link conditions, etc.
Delete Query
- Find the query to delete in the query list
- Click the Delete button in the action column
- Click OK in the confirmation dialog to complete deletion
Note: Deletion is irreversible; proceed with caution. System built-in queries cannot be deleted.
Export Queries
- Select the queries to export in the query list (multiple selection supported)
- Click the Export button
- The system packages the selected query definitions as a JSON file for download
Exported files can be imported in other environments for cross-environment migration of query definitions.
Import Queries
- Click the Import button
- Click Select File in the import dialog and select a previously exported JSON file
- If a query with the same name already exists, check the Overwrite option to overwrite it
- Click OK to complete import